
Review – HICTOP Dual Z Drive Kit For The Ender 3

Last week I took our Ender 3 to bits so I could upgrade it to a direct drive extruder. I’ve been pleased with how this turned out – it’s been printing away quite happily for a week with no obvious issues – but I did notice that the print quality on large, flat vertical surfaces wasn’t quite what it had been. It was definitely still acceptable – better than I was getting before I fitted the TL smoothers a few months ago, but not quite up to what I’d been used to.
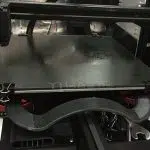
This wasn’t entirely surprising, of course. The direct drive upgrade moved a significant amount of extra weight onto the print beam, and I’d wondered how the Ender 3’s Z drive would cope with it. Of course, I was also keen to try out the HICTOP dual Z drive kit I already had stashed in my office. So, yesterday, I took the poor 3D printer to bits again and installed that.
The HICTOP Dual Z Axis Drive – What’s In The Box?
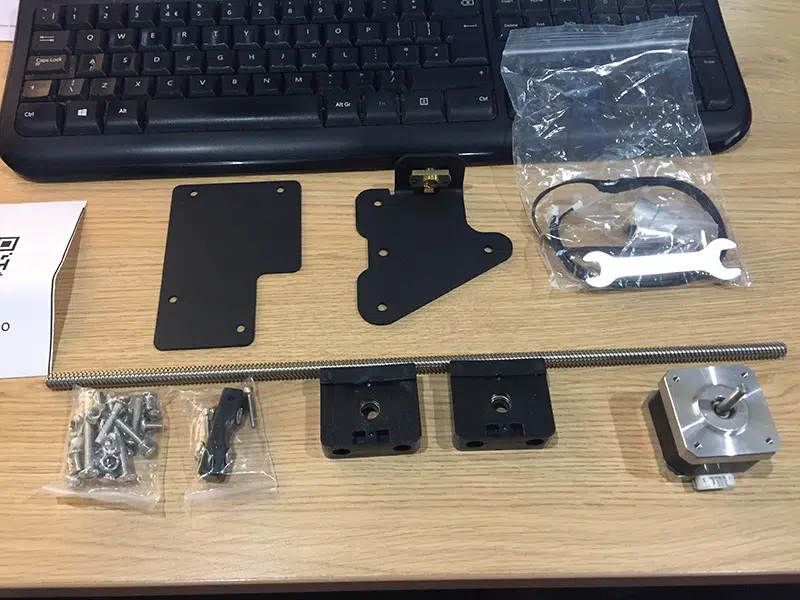
The kit comes packed in a cardboard box, with all the bits sitting in cut-outs in the foam. Inside are two steel plates, a stepper motor, an M8 lead screw, motor mounting bracket, two lead screw top guides and two bags; one is full of screws and T-nuts, and the other contains a cable and all the tools you’ll need to do the upgrade (in theory, anyway – it didn’t quite work out that way). There’s also a piece of paper with a QR code on it; this will take you to an online instructional video on YouTube. Unfortunately the QR code only let me watch it on my phone and I didn’t spend a fortune on 4K monitors so I could watch videos on my phone, but I managed to find the link to it.
The video itself is simple. There’s no narration and very few subtitles; it just shows someone installing the kit. Of course, that’s all you actually need because this kit is simple to install – in theory.
Getting Started
The first thing you need to do is remove the Ender 3’s power supply unit. It’s best to unplug it from the printer’s wiring harness so you can get it out of the way. Then undo the bolts that hold the POM wheels to the carriage on the (currently) unpowered end of the print beam, remove the wheels and take out the two screws that hold the carriage to the beam. That’s all the disassembly you need to do.
Rebuilding
In the kit you’ll find three (actually I got four) M5x40mm bolts. Push these through the carriage plate, screw the carriage back onto the beam, then transfer the POM wheels and their hardware onto the new bolts. Find the three tubular spacers in the kit and slip them over the bolts on top of the wheels. Now dig out the more complicated of the steel plates that came with the kit and slide it over the ends of the three bolts – it’s the one with the brass guide on a flange. Fit the nuts onto the bolts, then tighten and adjust them until the carriage runs smoothly on the upright when you turn the lead screw.
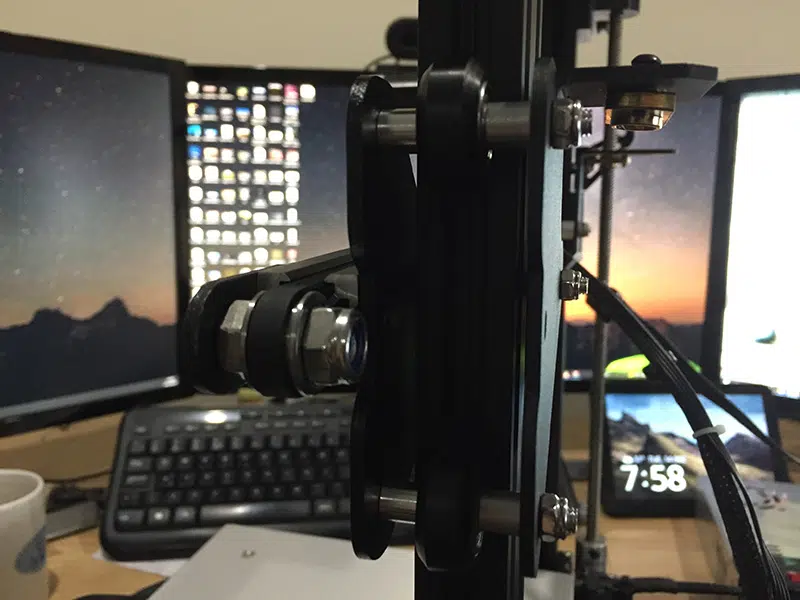
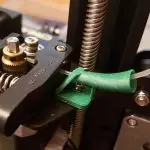
Find the motor mounting bracket; it comes it its own small bag along with a pair of screws. Use the screws to mount it to the top of the motor, then fit the T nuts on the back of it into the slots on the upright and tighten them enough to keep things in place, but don’t tighten them all the way yet.
Find the drive collar, fit it over the motor’s shaft and tighten the lower screw fully. Now thread the lead screw down through the brass guide on the new carriage plate until it’s fully inserted in the top of the collar, and tighten the upper screw.
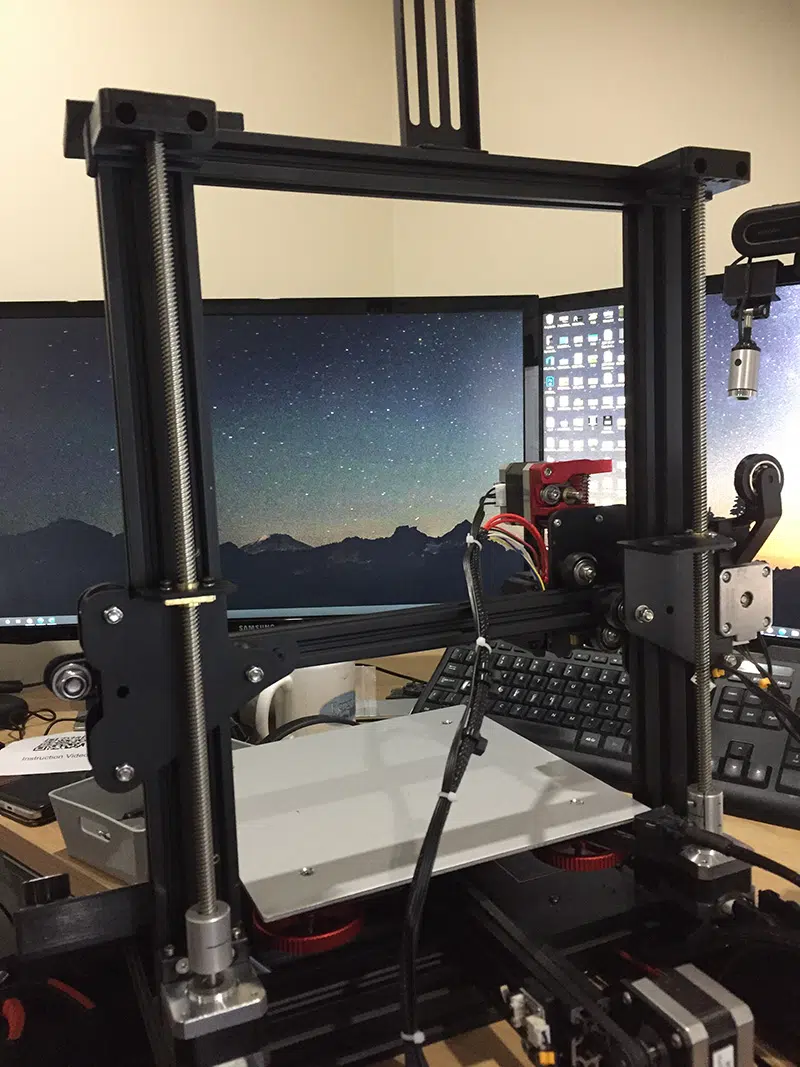
The HICTOP dual Z drive kit contains a pair of top guides for the lead screws. I’d already printed and installed one for the existing lead screw, but I figured it was best to have two matching ones. These are simple to install. Drop two M4x20mm screws down the holes in each guide and fit a T nut to each. Then just slip the guides over the tops of the lead screws, get the T nuts into the slots on the printer’s top bar, and tighten. At this point you can turn the lead screws (you’ll need to do both) to check the beam runs smoothly all the way up and down. If it does, tighten up the screws on the motor mounts and the lead screw guide on the new carriage.
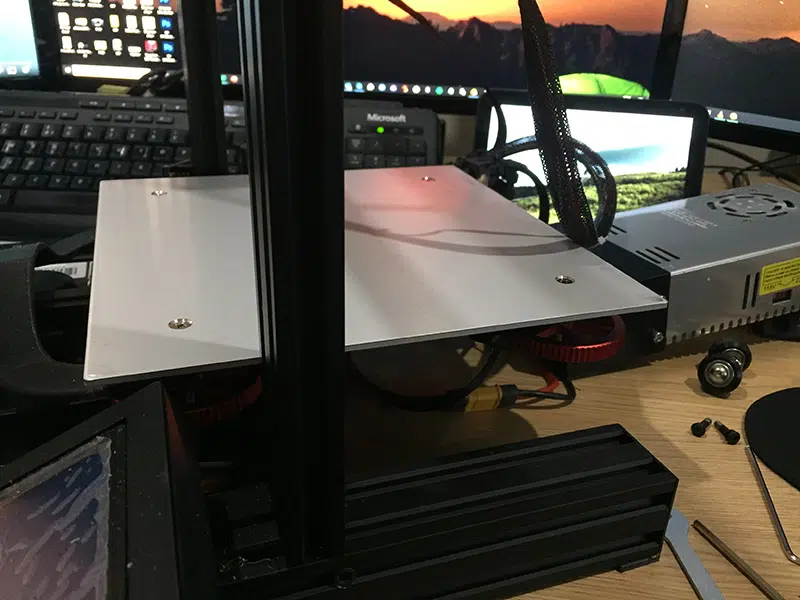
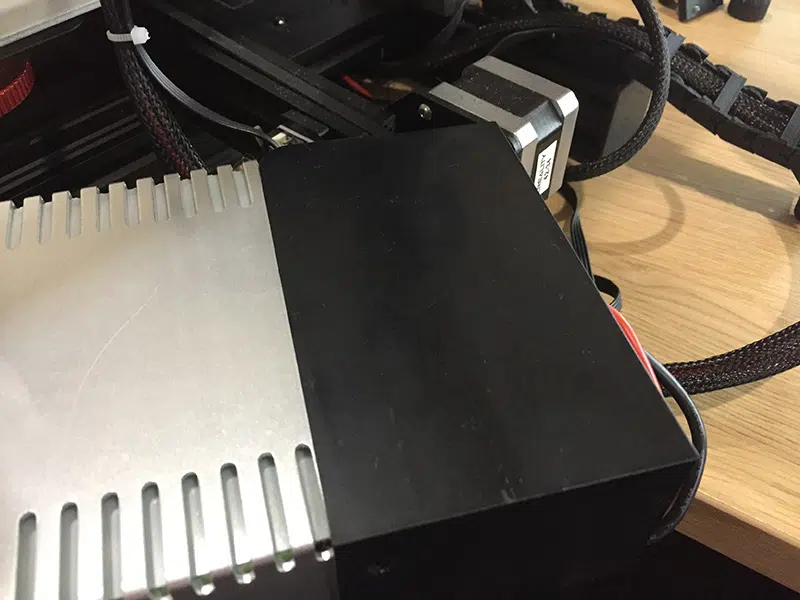
Now you have to refit the power supply, and this is where it got interesting. The new motor and lead screw mean you can’t screw the PSU to the upright where it was before. Instead, the second plate from the kit screws to the side of the PSU, then fits to the lower frame with another pair of T nuts.
Except there was a problem.
What, no holes??
The instruction video clearly showed two appropriately placed holes in the PSU, but my Ender 3 didn’t have them. Some investigation revealed that the holes were there in the metal body of the PSU, but were hidden by the plastic base that holds the power socket and switch. The one in the video had matching holes in the plastic, but mine didn’t. I had to dismantle the bottom end of the PSU, drill two holes in the plastic then reassemble it all and fit the mounting plate.
Then I had to dismantle it all again, because the cable from the PSU comes out a hole in the bottom of the plastic sleeve and it was impossible to mount it low enough to get the T nuts into the slots on the frame. I had to lead the cable out the front of the sleeve instead; then I managed to get the PSU reinstalled – slide it right to the back of the frame before tightening the T nuts – and plugged the cable back into the wiring harness.
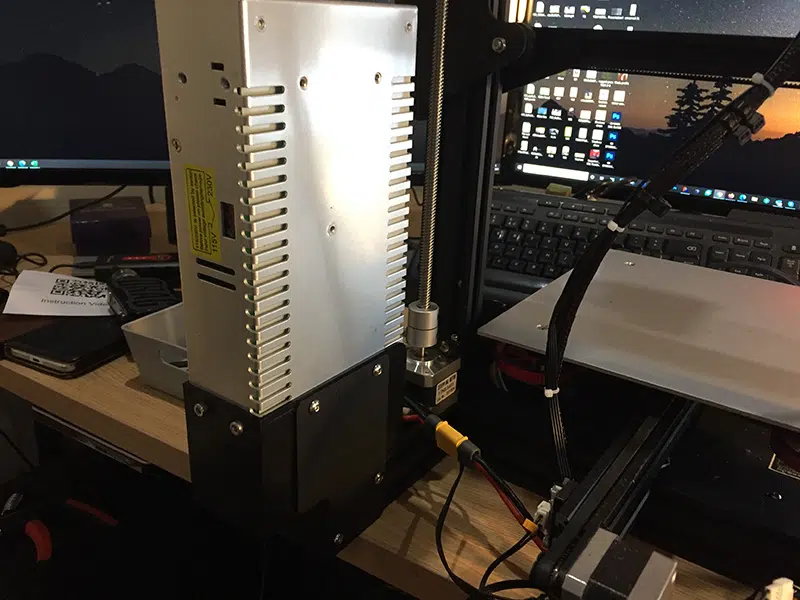
Just to be clear, the issue with the missing holes in the PSU wasn’t the fault of the kit. The way the cable got in the way was, I think. It would help if the mounting plate had an extra eighth of an inch between the upper and lower sets of holes; that would give enough space to comfortably mount it without relocating the cable.
The final stage is to provide power to the new stepper motor. In the kit you’ll find a Y splitter cable. Unplug the power lead from the back of the original Z axis stepper and plug it into the base of the splitter. Now just plug one of the splitter’s top connectors into each motor, use a cable tie to tidy it all up, and you’re done.
Does It Work?
When I got the printer back into its enclosure and powered it up, everything came back to life as expected. I levelled the bed – this is not optional; it was massively out of alignment – then started printing out a new webcam bracket, and the Ender 3 just quietly got on with the job. So yes, it works!
The Verdict
If you want to upgrade your Ender 3-series printer to dual Z drive, this HICTOP Dual Z Drive Kit is an easy way to do it. All the components seem well made; apart from refitting the PSU everything went very smoothly, and the major problem I encountered with that wasn’t the kit’s fault. The cable issue? I’m less sure about that. I could possibly have wiggled the cable down into the slots on the top of the frame, and gained enough clearance that way, but relocating it to the front worked just as well. A slightly higher mounting plate would work even better, though.
Anyway, that minor niggle aside, this is an upgrade you can do in well under an hour – and it all seems to work perfectly. I’ll let you know how it’s performing next week.


Leave a comment
You must be logged in to post a comment.