
Ender 3 Updates

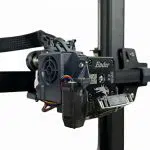
A couple of weeks ago I installed a Creality filament runout sensor on our Ender 3, but I wasn’t able to test it because the hot end suddenly downgraded itself to a not-quite-hot-enough end. That was a bit of an annoyance, but luckily a replacement hot end is a fairly inexpensive item and I soon got my hands on one.
Replacing The Hot End
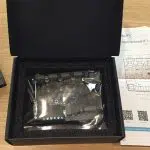
Fitting a new hot end is a job you’ll likely have to do at some point. They’re quite hard-working little chaps, and the heating element inside can give out under the considerable load it carries. I suppose it would be possible to just replace the element, but at £14.99 for a complete hot end you might as well swap out the whole thing.
Compared to some of the upgrades I’ve done on our 3D printer, fitting a new hot end is easy. There’s no need to find instruction videos on YouTube or puzzle out where and how parts are supposed to be fitted. All you need to do is remove the old hot end and use the same screws and mounting points to install the new one.
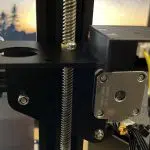
The only tricky part of installing a new hot end is running the cables from the heating block to the motherboard. The original cables run through a protective sleeve, and while the two red wires that power the heater can be wiggled through that easily enough the thinner wires for the temperature sensor, which have a connector on the end, are a lot tricker to get through. In the end I just gave up and cable tied them to the outside of the sleeve along with the wires for the CR Touch auto-levelling probe. However, I’m considering getting some heat-shrink tubing and encasing the whole lot in that; with all the extra bits we’ve added to our 3D printer its wiring is getting a little untidy.
Testing The Runout Sensor
Anyway, back to the runout sensor! With the 3D printer working again it was time to see if our latest addition worked as advertised. I loaded some PLA, feeding it through the sensor then down into the extruder and hot end, and picked a random file from the TF card. Then, once the Ender 3 started the print job, I simply snipped the filament a couple of inches from the sensor and waited to see what happened.
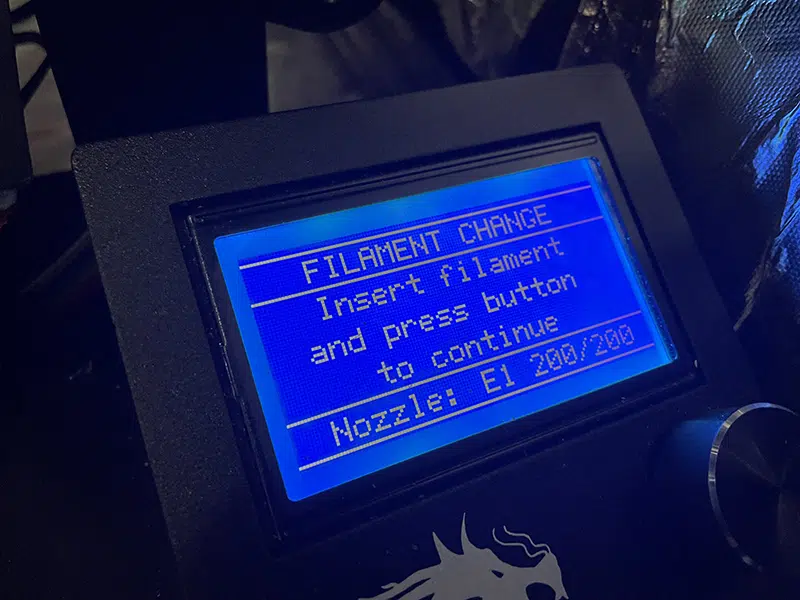
Not long after the end of the filament disappeared into the sensor the printer abruptly stopped, returned the print head to its home position then let out a loud beep to let me know something was wrong. When I checked the screen was now showing the message “Filament change. Insert filament and press button to continue.” Well, that seemed clear enough. So, obediently, I reloaded the filament and pressed the button. The Ender immediately started heating itself back up to operating temperature; when it had done that it went through its purge routine, laying a double line of filament down one side of the print bed, then flawlessly restarted the print exactly where it had left off.
The Verdict
I’ve lost a few prints because the filament ran out or broke before they were complete. If you leave your 3D printer running unattended and don’t have something like Octoprint to watch it for you, it’s more or less inevitable that this is going to happen sometimes – and when it happens near the end of a print it’s pretty annoying. Now, thanks to the Creality runout sensor, I’m protected from that. If the filament runs out while I’m out of the office, all I’ll have to do when I get back and discover the problem is load a new roll of filament and press the button to resume the print.
The only downside I’ve discovered so far is the location of the sensor. It’s designed to work with a standard extruder setup, and if that’s what your running its location is perfect – right next to the extruder. Unfortunately, if you’re running a direct drive setup the same location is less ideal. The filament is going all the way down to the sensor, mounted at one end of the print beam, then up and out to the print head. This is putting a lot of tension and friction on the filament, and I think even our beefed-up new extruder was struggling to overcome it sometimes. It isn’t easy to just mount the sensor somewhere else, either; it’s actually integrated onto the extruder mount it comes with. I’m looking at removing the sensor from the mount and printing a new back plate for it with fittings that will let me install it above the direct drive unit.
My conclusion about this sensor is the same as when I fitted it: If you have a conventional Ender 3, it’s an excellent upgrade at a very attractive price and I wouldn’t hesitate to recommend it. If you’re running a direct drive setup, however, you might be better off with an alternative sensor that can be mounted in a better location.


Leave a comment
You must be logged in to post a comment.