
Ender 3 Build – The Story So Far

Our Ender 3 custom build is starting to gather pace, and Fergus has been very busy assembling, testing and upgrading our base level Ender 3 printer. Here we take a look at what has been done so far since we started this project.
On 28th February Fergus (our main man and all round good egg) announced that we had the Ender 3 and was getting ready, with some trepidation, to start assembling the kit.
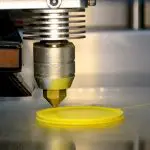
Then on March 8th Fergus completed the initial assembly of the Ender 3 and with a few teething problems he managed to get the 3D printer running, level the bed, load the filament and try the printers very first test print. It turned out to be a success! He then printed a couple more small items and they too turned out to be a success.
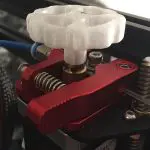
Towards the end of March he had a bit of a nightmare but in all fairness this is all part of the learning curve and is all good experience. The aim of this Ender 3 custom build project is to take a bog standard Ender 3 and customize it to make it work a lot better, documenting every step of the way. The fault was actually caused by a blocked nozzle. This was causing the extruder to run out of torque and start slipping, making a strange knocking sound. It turned out that the nozzle was blocked so the nozzle was promptly cleared with a cold pull and it started working again, but alas it did it a second time when he started printing another Benchy. It was already pretty clear to us even at this early stage of the project that an upgraded extruder would be a very wise investment, so we went ahead and ordered one; a Redrex all metal extruder for just £12.99.
On the 1st April the 3D printer enclosure was assembled and we did a review of it going into detail on how it benefits the Ender 3 printer. It turns out that it is very good, and most certainly helps with producing better prints, so is certainly worth considering if you are even remotely interested in getting into 3D printing.
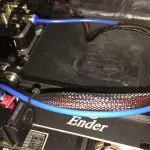
Our next update came on 15th April when Fergus upgraded the Bowden tube to a much better one. A better quality tube gives smoother feeding of the filament and is a ridiculously cheap upgrade at less than £5 for a PTFE tube. There are many inexpensive tweaks that can be done and this is going to be one of many that we will be doing on our journey.
Remember that all metal extruder that we said we bought for £12,99? Well our final update of the build project so far came on 21st April when Fergus fitted it to the 3D printer. Although we haven’t tested it yet (that’s next up) the signs so far are looking very good, the filament went into the tube seamlessly every time. This bodes very well for some great prints.
So there you have it, the story so far of our Ender 3 build. We are just starting with this project and are less than 2 months in, we still have some way to go and we will be continually updating our base Ender 3 to show you how it is possible to take a great value entry level printer and make it a lot better. We will also be experimenting with things like 3D scanners too so please bookmark us so you can easily keep track of our progress.


Leave a comment
You must be logged in to post a comment.