
3D Printing Joints

A while ago I looked at the various kinds of hardware – nuts, bolts and so on – you can use to connect 3D-printed parts together. We’ve also covered a few other ways to connect parts, including glue, solvents, a soldering iron and even welding with a 3D pen. All these methods work, and sometimes one of them is the only thing that will work, but other times you can avoid the necessity. When you design your own parts, you can build connectors right into the design. That does need some care, though, so let’s look at how to do it.
Designing Connectors
There are many types of connectors you can design into your projects, but they all rely to some extent on the flexibility of your print material and the friction between parts. Here are some of the most useful.
Peg Joints
This is one of the simplest types of joints. All you do is add a peg to one piece, and make an appropriately sized hole in the other one. Once your parts are printed just push the peg into the hole, and if you’ve got the tolerances right (I’ll cover that later) the friction between peg and hole will keep the two pieces together. When designing peg joints try not to leave excessive gaps inside; if your hole is 15mm deep, make the peg 15mm long minus the appropriate tolerance. Round pegs leave you some wiggle room for adjusting the parts, and often go together more easily; square or rectangular pegs will lock the parts together with no risk of them twisting out of alignment. Of course, using two or more pegs of any shape will have the same effect. Here’s a round one:
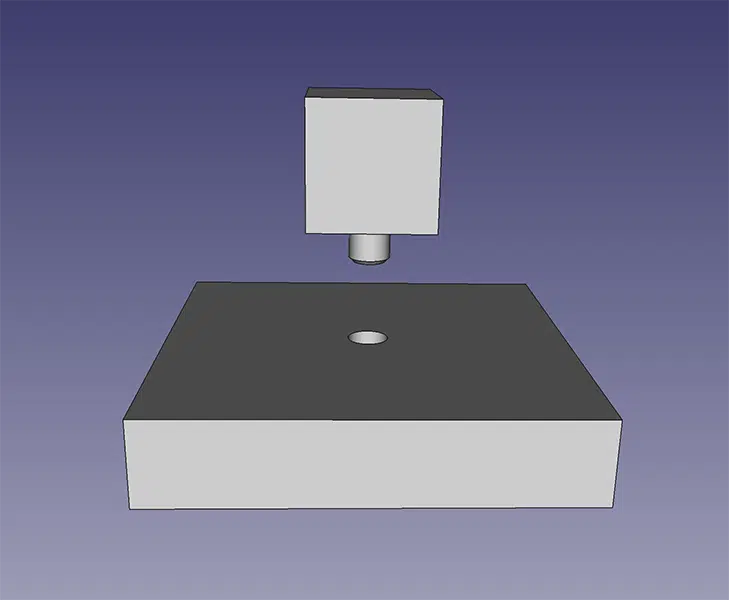
If you bevel the end of the peg it will go into the hole a lot more easily.
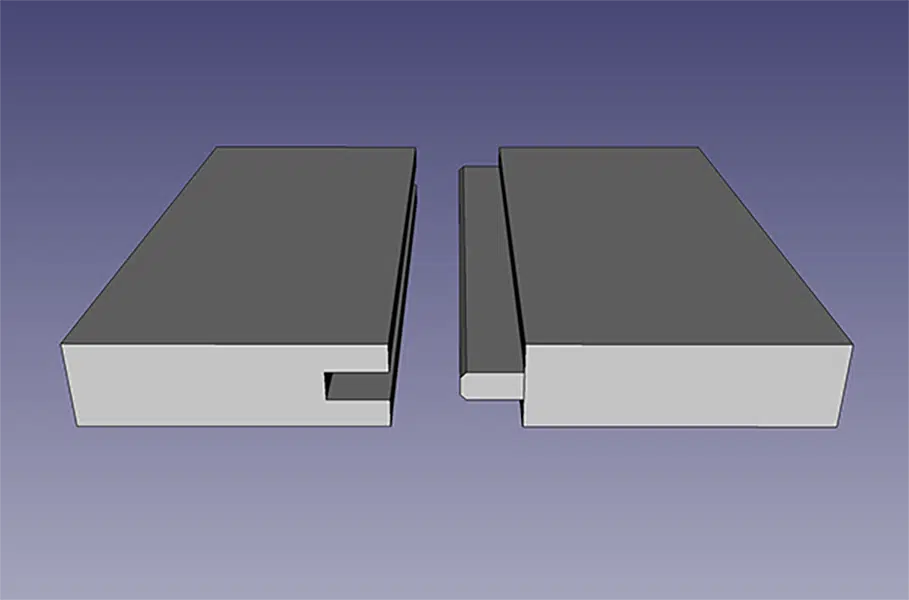
Tongue and Groove Joints
This old woodworking joint can also work very well with 3D printed objects. Make a groove in the surface of one part, on the other part, add a tongue that matches the size of the groove. Again, it goes together much more easily if you bevel the edges of the tongue. This is a good way to make longer joints, because it’s a push fit. You can slide the two parts together, but if the joint is tight enough you might find that friction quickly builds up to the point you can’t slide the tongued part any further.
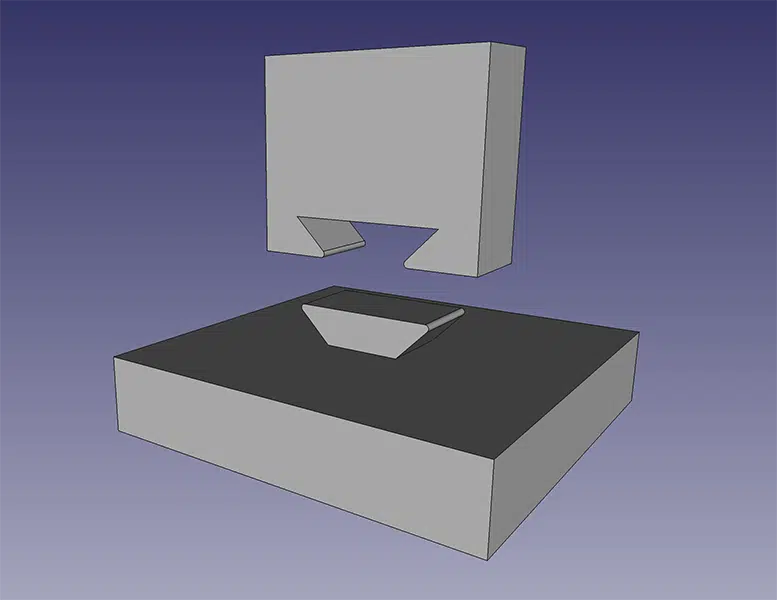
Dovetail Joint
If tongue and groove joints have one serious problem it’s that the tongue can pull out the same way as it went in. One way to prevent this is with a dovetail joint. This follows the same basic principle as tongue and groove, but both parts are profiled so that the “tongue” is wider at the bottom of the groove than at the top, so it can’t pull out. You need to slide the parts of a dovetail joint together, and this can be tricky unless you get the tolerances exactly right; I’ve printed parts with dovetails less than a quarter inch long that had to be literally hammered together to overcome the friction. If you get the size right, though, these are very secure joints. Eliminate any risk of the dovetail sliding out again by adding a hole that goes through the side of the grooved piece and into the dovetail, then use a screw to lock it all together.
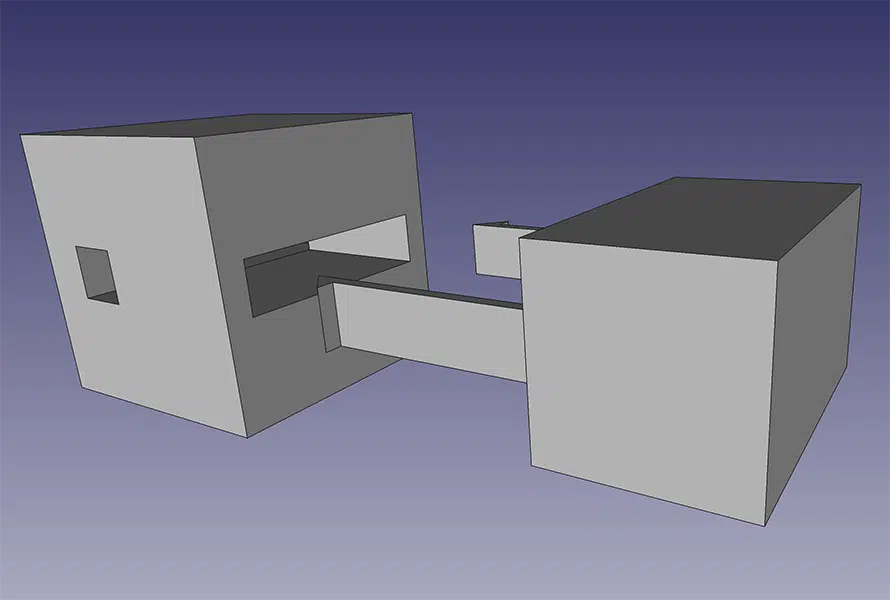
Snap-Fit Joint
This joint is a little trickier to design, but it’s very easy to use. Add two or more prongs to one part, with a triangular barb on the end of each. On the other part create slots with a recess at the inner end. To fasten the joint simply push the prongs into the slots. They’ll bend slightly on the way in; when the barbs reach the recesses the prongs will snap straight again, locking the two parts together. If you cut the recesses through to the outer surface of the part, you can unfasten the joint by pulling on the pronged part at the same time as you push the barbs in; if the recesses don’t reach the outer surface, once the joint is fastened it’s staying that way.
Tolerances
I’ve mentioned tolerances a couple of times, because they’re very important. If your tolerances are too large the joint will be sloppy and loose; if they’re too small, you might not be able to get the joint together at all. Find out the right tolerance for your printer by downloading and printing the Tolerance Test from Thingiverse:
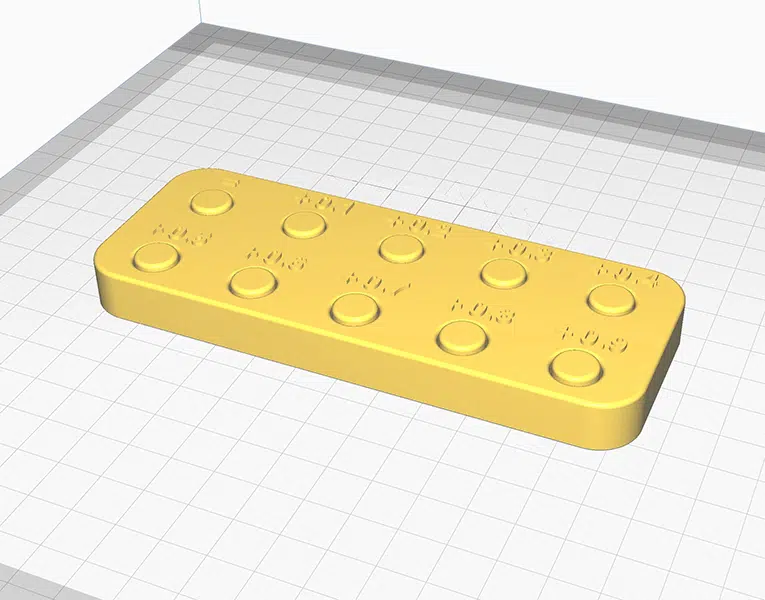
The base of this thing has ten holes, each with a button printed in place. The buttons are made with tolerances from zero (marked =) to 0.9mm. Once you’ve printed it simply start pressing the buttons, starting at 0.9mm and working your way down. The last one that pops out of the base is the tolerance that works with your 3D printer. For example, if you can pop the 0.4mm button but the 0.3mm one stubbornly stays in the base, make your pegs, dovetails and tongues 0.4mm smaller than the holes or grooves they fit in, and you should get a good, secure joint.
Finally, just to check it’s all going to work, print the joints on their own before doing the whole project. That way you can test them to make sure they work properly before you use a load of filament. Do you have any other tips for making 3D printed joints? Let us know in the comments!


Leave a comment
You must be logged in to post a comment.