
Welding With A 3D Pen

A couple of weeks ago we looked at a few ways to join 3D printed parts together, and one of the methods I mentioned was using a 3D pen as a sort of miniature glue gun. The idea is simple – use the pen to squirt molten filament onto one of the parts you want to join, then before it has a chance to cool, press the other part onto it and let the whole lot solidify. Welding With A 3D Pen sounded pretty simple. In fact it sounded like it might be too good to be true. So we got a 3D pen and tried it.
Finding A 3D Pen
There’s no shortage of 3D pens for sale online, and some of them are ridiculously cheap. The cheapest I could find on Amazon was £15.49, and there were plenty more under £20. The problem was the reviews on these models were, let’s say, not reassuring. A lot of unhappy customers were complaining about inconsistent temperature control, nozzles blocking easily and of course that old favourite, “It just didn’t work.” To avoid this sort of nonsense we opted for one that was still affordable but seemed to have gone through some sort of actual quality control. In the end we chose the Giantarm TG-17, which cost £36.99.
What’s In The Box?
The TG-17 comes in a sturdy cardboard box; open it up and the pen is on top, resting in a moulded plastic tray. This lifts out to reveal a decent collection of other goodies, including a rest to hold the pen, USB power cable, a UK 3-pin adapter, a couple of silicone things which I believe are finger protectors (although they don’t fit my fingers) and a dozen ten-foot lengths of 1.75mm PLA in various colours, vacuum-sealed in two bags. There’s also a leaflet with various templates you can trace with the pen, and a sheet of clear plastic to lay over them while tracing.
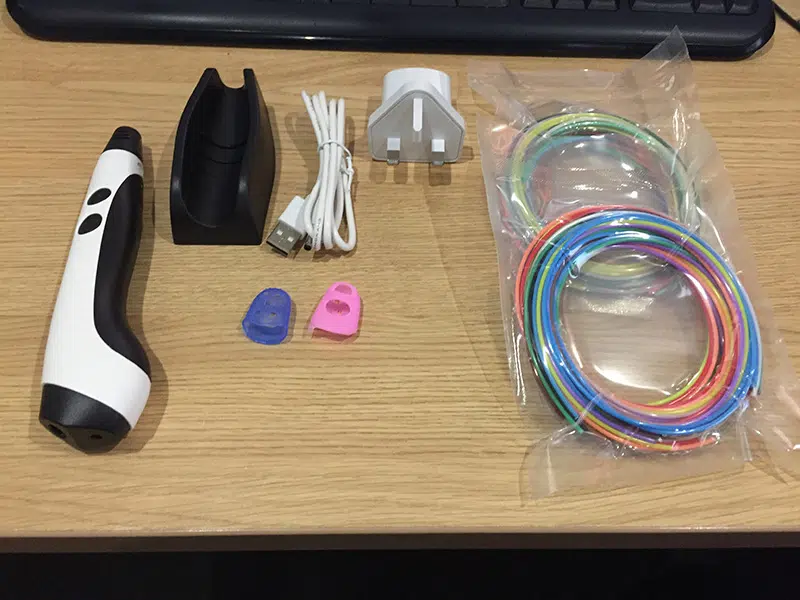
The 3D pen itself is plastic and quite lightweight, but it feels well put together and not at all flimsy. Shake it vigorously and a couple of its plentiful buttons rattle a little, but that’s not really an issue. It’s much chunkier than a normal pen but fits in the hand well, and I’ve used metal fountain pens that were probably heavier, so it’s comfortable to use.
You’ll find two large buttons on each side of the pen. The pair on the left let you extrude or retract the filament; the ones on the right increase or reduce the extrusion speed. On top there are two smaller buttons flanking a tiny LCD screen. There’s a ceramic nozzle at one end, and a power jack and filament port at the other. All the buttons have a nice positive clicky feel.
Using the pen is very simple. Just plug in the power cable – this isn’t a rechargeable model – and use the two small buttons to flick through filament modes until you get the one you want; there’s a choice of PCL, PLA or ABS. Then press the extrusion button to start preheating. A small red light will come on beside the LED screen. When that turns green just push the extrusion button again and push the end of your filament into the loading port. The extruder will quickly catch it and push it through the pen, and a few seconds later a stream of molten plastic will start worming from the nozzle. You can start and stop extrusion at any time by just clicking the extrusion button.
Once you’re done printing, stop extruding then hold the retraction button for three seconds. The filament will be pushed out the back of the pen. Once the end comes out you can unplug it. If you use a different colour next time you’ll need to let it extrude for a few seconds to clear out the remains of the old one.
But Can It Join Parts?
I couldn’t print test objects to stick together because our Ender 3 is in mid-overhaul right now, but I rummaged in my bag of Benchies and came up with half a dozen black PLA ones that were bad enough to be disposable. Then I warmed up the pen, loaded it with white PLA filament so the joins would show up in photos, and set about trying to stick pairs of Benchies together base to base.
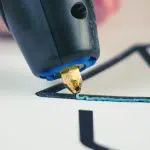
First I attempted the glue gun method, extruding some filament onto one Benchy and then pressing the other one onto it. Does it work? Well… sort of – but it’s not easy and, I suspect, not all that effective.
The problem I found was that while the extruded PLA stays hot and flexible for a reasonable time – up to a minute or two if you extrude enough of it – it only stays molten enough to stick to another chunk of PLA for a few seconds. After multiple attempts I found that the only way to really get it to work was to quickly draw a shallow V of plastic on one Benchy, drop the still-extruding pen into my lap then snatch up the other Benchy and press them together. There wasn’t really time to line the parts up carefully, and even at my quickest the plastic wasn’t fluid enough to spread out very thinly. So this method leaves quite large gaps, and it isn’t hugely strong either. I did manage to stick two Benchies together firmly enough that you can pick them up and handle them, but if I dropped them on my desk from six inches or so I suspect the joint would break (a couple of earlier experiments did). This method will work if you want to quickly tack a couple of pieces together, but I wouldn’t use it for anything that needs to take a load.
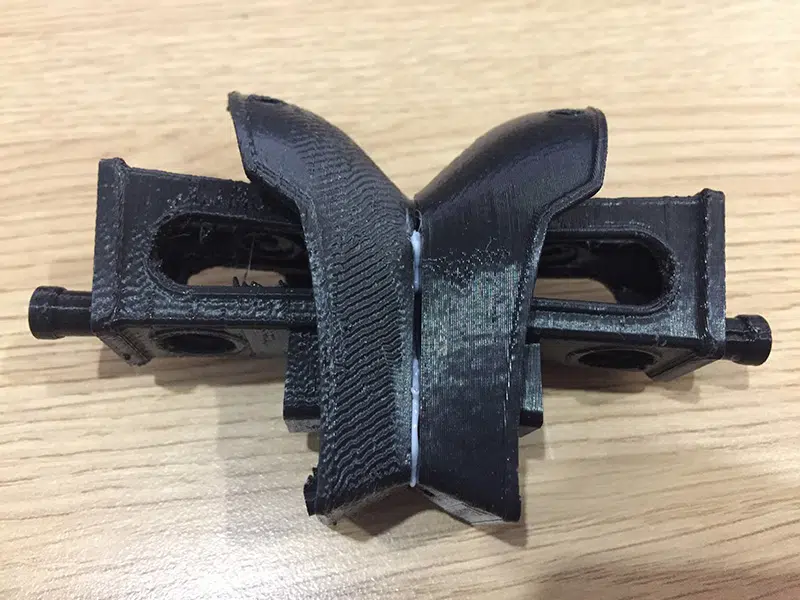
You can see the large gap quite easily.
Then I had a thought. Many years ago, when I was a student, I spent a summer working in a welding and fabricating shop. The shop had a load of MIG welders, which extrude a length of wire through a hot arc that melts it. Sort of like a big 3D pen, really, except it can melt steel and you’ll go blind if you look at the arc without a welder’s mask. Could I use the TG-17 as a sort of mini welder?
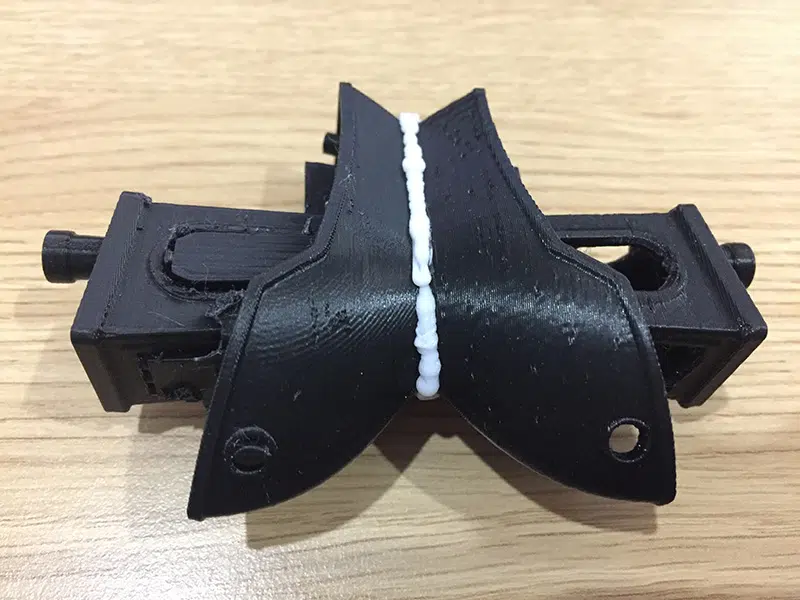
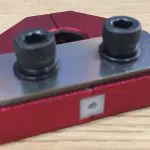
Yes, I could. I clamped the next two Benchies together base to base, which let me line them up properly, then ran a bead of molten PLA along the join. It stuck them together, quite firmly. In fact when I held them both by the wheelhouse and pulled as hard as I could (and I shoot a 60lb English longbow for fun) I couldn’t separate them. It’s not the neatest joint in the world, but it’s definitely a lot stronger than the glue gun method.
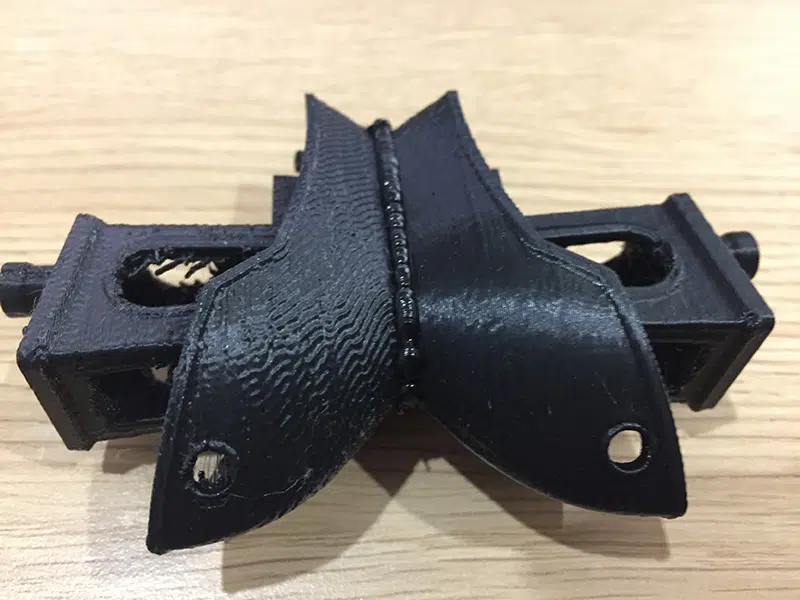
Last, I reloaded the pen with black PLA and tried the final pair of Benchies. Again I clamped them together and welded round the join, and because I’d had some practice I managed a much neater bead. I suspect that moving the pen relatively slowly is dumping enough heat to melt the edges of the Benchies, fusing them and the bead into a proper weld.
If I was designing parts to join together with a 3D pen, I think what I’d do is put a 2mm chamfer along all the edges to be joined. When the parts were held together that would give a V-shaped groove round the join. I’d run a bead of plastic along the bottom of that groove, then a couple more to completely fill it. Then I’d use a file, sandpaper and solvent to smooth out the join.
One last observation – don’t let the extruded filament from the pen near any fine details on your print, because it will melt them almost instantly. I used ours to thoroughly destroy one of the Opticon benchmarks I printed last week.
The Verdict
So, can you use a 3D pen as a glue gun to stick printed parts together? My experience says sort of, but not really. If anyone has a different experience please let us know in the comments! On the other hand you can definitely use one to weld parts together. The resulting join will need some finishing work if you want it to be neat, but it should certainly be strong enough for most purposes.
As for the TG-17 pen itself, it does exactly what it says on the tin and seems to do it very well. It’s simple to use and melts PLA very efficiently. A lifetime’s consumption of caffeine, nicotine and alcohol means my hands might not be steady enough to make a butterfly or Eiffel Tower from the supplied templates, but I’ll definitely try making some models with it and let you know how they turned out!


Leave a comment
You must be logged in to post a comment.