
Joining 3D Printed Parts

If you get enthusiastic about 3D printing it won’t be long before you find yourself wondering how to stick two or more pieces of printed plastic together. There are a couple of reasons you might need to do that. A common one is making things that are larger than your printer’s build volume; the obvious solution is to print it in several pieces then fix them together later. Unusually shaped objects can also be easier to print in several pieces; 3D printers can manage far more complex shapes than any other manufacturing method, but even they have limits. And, finally, there’s simple breakage; if something you printed gets broken you might prefer to fix it rather than print a new one. So, for whatever reason, you have some bits of plastic and you want to turn them into a single piece. What’s the best way of joining 3D printed parts together?
Glue
This is the traditional solution when you want a couple of things stuck together. Just dig out the appropriate kind of glue and stick away. For most 3D printer filament the appropriate kind of glue is cyanoacrylate – superglue. It’s reasonably strong, sticks things in seconds and creates fine joins that can be practically invisible. On the other hand it’s also rigid when it dries, so it’s no good for flexible filaments, and any leakage can leave stubborn white marks on the surface. Let’s not even get into the dangers of getting it on your fingers. Epoxy resin is a two-part glue that needs to be mixed, and unlike superglue it takes some time to set, but it’s immensely strong and can fill small gaps.
Solvent
If you’ve ever built an Airfix kit you know how this works. Coat both surfaces with a solvent, wait a moment for it to dissolve the top layer of plastic, then press the bits together. When the solvent evaporates the surfaces will be securely bonded. The right solvent to use depends on the filament, but acetone works well on both PLA and ABS. Get a paintbrush (with natural bristles – not plastic!), brush both surfaces you want to bond with acetone, wait a few seconds then press the surfaces together firmly and hold them for a few minutes. Clamps can be useful here. The dissolved surfaces will be effectively welded together when the acetone evaporates and the plastic hardens again.
Welding
Of course you can literally weld pieces together, too. Just melt both surfaces with a soldering iron, press them together and wait for the plastic to cool. This is easy and can give a strong join – but from personal experience it’s hard to get a neat join.
A variation of this method is to use a 3D printing pen as a glue gun. The hot filament it extrudes will slightly melt your pieces, and many people say it gives a strong bond when everything cools. It’s also supposed to be a great way to fill gaps in a rough join, and as you can use the same filament you printed the parts with it’s easy to get an exact colour match. I’m hoping to try this method myself quite soon.
Screws
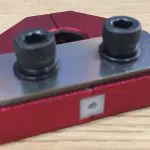
And finally there’s the mechanical solution. Machine screws or bolts are very good at joining 3D printed parts together. Either design holes into the parts to make final assembly easy, or drill them after printing. Make the holes a fraction smaller than the diameter of your screws, and the threads will bite nicely into the plastic.
Unless you spend a lot of money on a large commercial printer, build volume is one of the most frustrating limits on what you can print. Once you’re able to securely and neatly connect printed parts you can break free of that restriction and print much larger objects.


Leave a comment
You must be logged in to post a comment.