
Finishing Touches

So your printer has finally squeaked to a halt and you’ve levered your new project off the print bed. Congratulations, job done!
Well, actually, probably not. If you want the best results, the chances are you still have a little more work to do. A 3D printer is a fast way to create objects, but most of the time they need at least some finishing touches. Unfortunately that’s not something you’re likely to find in your printer’s manual, so here’s our handy guide to some useful finishing touches for your project.
The Basics
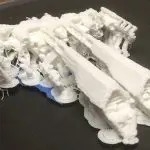
Unless your print is a simple one, there’s a good chance it needed some supports during the printing process. If your printer has multiple heads you might be able to print the supports in a soluble material then dissolve them after printing, but otherwise you’re going to have to remove them. You can break them off with pliers, but a sharp knife will give a cleaner finish.
Are there any bubbles or gaps in the print? Gaps can be filled by dissolving some scraps of filament in an appropriate solvent – for example acetone for ABS, or Plastruct liquid glue for PLA – to make a thick soup that can be used as a filler. Epoxy fillers like Milliput work well on harder plastics.
Surface Finishes
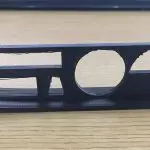
If your print is going to be visible, you’ll probably want to improve its surface finish. There are a few ways to do that. The simplest is simply to polish the surface. How you do that depends on the material you used. ABS can be polished easily with a cloth dipped in acetone. That won’t work on PLA, but you can use some Brasso to give that a shine, or even a light going-over with a heat gun.
Fine sandpaper can create an attractive satin finish, and it’s also great for preparing a surface for painting – but don’t use power tools, because that risks melting your print. If you paint an object straight out of your printer the chances are the paint won’t stick very well, so sanding it first is a good idea. So is a layer of undercoat.
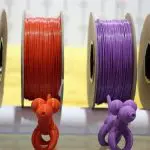
Surface finishing also helps hide the layers created during the printing process. Even if you’re using a coloured or metal-impregnated filament, it’s worth smoothing or polishing the surface to bring out its appearance.
Glueing
Sometimes the object you want to print just won’t fit in your printer’s build volume. No problem; just use your software to slice it into manageable chunks, print them all, then glue them together. There are various kinds of glue that will work, depending on the material you print with. Plastruct liquid glue is great for PLA; model kit glue is perfect for ABS. Epoxy resin will stick anything.
Inserts And Extras
What if your print needs some extra pieces to function properly? If you’re planning on screwing anything to it, you can always just print threaded holes into it, but that’s not a durable solution. It’s better to fit threaded brass inserts into the print after it’s completed. You might also want to add metal reinforcement or even electrical wiring.
There are a lot of ways you can improve your project once it’s printed with some lovely finishing touches. In future posts we’ll look at some of them in more detail. If you have any tips of your own, let us know!
Leave a comment
You must be logged in to post a comment.