
Auto Levelling – What Is It?

If you want good-quality 3D prints, one of the things you absolutely have to get right is the print bed setup. If the bed isn’t level you’re going to have adhesion problems, alignment issues and even, in extreme cases, damage to the print nozzle. The problem is that levelling your print bed is a pain in the… well, it’s a pain. It involves lots of fiddling with bits of paper, guesstimating the size of tiny gaps by how much friction the paper creates, pulling your hair out and usually adjusting every corner 17 times or so before you finally get it right. Wouldn’t it be great if technology could somehow level the bed for you?
Well, actually it can.
A lot of 3D printers now have auto bed levelling, which do the work for you and mean you can leave the paper in its packet and your hair on your head. Of course a self-levelling bed is one more thing that can go wrong, but if your printer has one – or can take one as an upgrade – it can be a real boost to the reliability of your prints.
So how does auto bed levelling work?
The name “auto bed levelling” is actually a bit misleading. It creates an image of the printer busily adjusting itself to bring the bed perfectly level, while you watch proudly. This isn’t what happens. Instead, the printer runs a self-test routine with a probe attached to the print head, and maps the bed. Then it adjusts the bed profile in software, so when you send a file to the printer it knows it isn’t starting with a perfectly level bed and adjusts the print path to compensate.
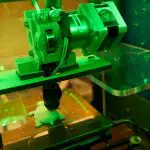
An auto-levelling system on a fused-deposition modelling printer works by reading the surface of the bed and working out what angle it’s at (and if it’s warped at all). This means the print head needs a sensor fitted to it. This sensor is a unit mounted close to the actual head, and it uses either a mechanical probe or a capacitance pressure sensor to measure the difference between the correct head to bed distance and the actual one. It repeats this in a pattern across the print bed, then constructs a virtual map of the bed in the printer’s firmware. When you load a print job the printer uses that map to keep the head on a level plane, and avoid adhesion problems or ploughing itself into the bed.
Sounds good! How do I get it?
Well, you can buy a printer that comes with an auto-levelling bed as standard. Most high-end and an increasing number of mid-range models already have one fitted. This is obviously the simplest solution; the hardware is already built into the printer and the firmware supports auto levelling, so you’re good to go right out of the box.
If you already have a printer, and it doesn’t have auto levelling, don’t panic. You can almost certainly upgrade it to add that capability. How easy that is depends on your printer. There are upgrade kits available for the most popular models – we’ll be trying a couple for our Ender 3 this year, among other upgrades. Even if there isn’t a kit for your printer the chances are you can find information online about how to upgrade it, using some electronics and a few printed parts.
You can get great results with a manually levelled print bed, but auto levelling lets you get the same results more reliably and with less ongoing maintenance. If you’re printing a lot it can give you serious savings in time and material, making it a really effective upgrade. Check back for more once we get to work on the Ender!


Leave a comment
You must be logged in to post a comment.