
3D Printing A Webcam Mount

Do you ever get the feeling that what you mostly do with your 3D printer is make parts and accessories for your 3D printer? I have to admit, I do. Our Ender 3 has created a lot of parts for itself since I got it up and running, and I have plans to make some more in the near future. However, I’d really prefer not to devote a big chunk of my office to a self-licking lollipop, so last week I decided to create something that would be useful in a non-3D printing sort of way. And I already had a project in mind.
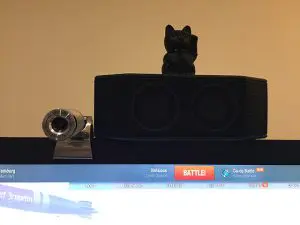
Like most people these days, I do video calls quite a lot. Unlike most people these days I hate using a laptop. I have a couple, and take one with me when I go on a trip, but I really prefer my desktop setup. Unfortunately desktops don’t have built-in webcams, so I have to attach one to the monitor. This has been bugging me for two reasons. One, there’s a speaker clamped to the top of my monitor, right in the middle – you know, where a webcam would naturally sit. Two, my webcam came with a distinctly shonky mount. You just have to look at the bloody thing the wrong way and it slips down over the screen.
So, now that I have a 3D printer, I decided to design and make a new mount that would solve both these problems. After some sketching I decided to go with an inverted channel that drops over the monitor frame. The speaker could clamp onto that, rather than the frame, and a bracket on the front would hold the camera.
Creating The 3D Model
The first step was to take some measurements. I needed to know the width of the monitor’s frame, the length and depth of the flange under the front of the speaker, and the length and diameter of the screw that holds the camera to the mount. I also had to measure the thickness of the camera cable, so I could make channels for it inside the mount, and the dimensions of the cable’s USB plug and RFI damper, because they’d need to pass through the mount. I took the measurements using a set of digital calipers, which are pretty much essential if you want to print anything that fits together with existing objects.
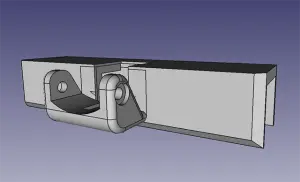
I designed the mount in FreeCAD, starting with a rectangular block then adding and subtracting shapes to create the final design. This involved a lot of shapes, but finally I ended up with the inverted channel, a bracket at the front with a cutaway behind it to take the speaker flange, a hole large enough for the RFI damper to pass through, internal cable runs and a hole for the mounting screw. I also designed a simple tubular spacer so I could reuse the original mounting screw, which was a lot longer than strictly needed.
Printing The Mount
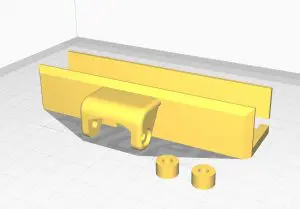
The finished model was sliced in Cura. I decided to print it upside down to save on support material, and added two spacers to the job before exporting it. Just to make sure I’d got everything the right size, I printed one out at low quality and tested all the parts for fit. It turned out I needed to enlarge the holes for the screw heads slightly; once that was done I changed the settings to 0.12mm layer thickness, resliced and printed the final version in black PLA.
Six and a bit hours later the job was done. I cut away the supports and cleaned up the ragged bits, then fitted everything together. The mounting screw needed a couple of light taps with a hammer to seat it fully, but that gives it a nice snug fit with enough friction to hold the camera at whatever angle I set it. The cable fits neatly in the internal channels, and emerges through a small cut-out at the back.
Once I had the camera installed, all I had to do was drop the webcam mount over the top of the monitor frame then mount the speaker on top of it. The flange at the front of the speaker fits down behind the camera bracket; its hinged base pushes against the back of the monitor, holding the whole thing in place.
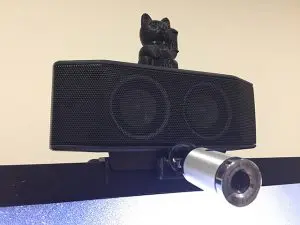
The new webcam mount is much more stable than the old one – in fact it’s rock solid, and there’s no way it can slip down even a fraction of an inch. The camera and speaker are now both where they should be, in the centre of the screen, and the camera is over an inch lower, which helps hide my male pattern baldness.
Success?
This wasn’t my first experiment in designing objects for 3D printing. I’ve made a couple of simpler things; a holder for my hair clippers, for example. It’s the most complicated, though, and the first that was designed to work with other components. Creating the design meant visualising how all the parts would work together – and the hardest part of that was actually running the cable through the body of the webcam mount – then taking all the necessary measurements with a very high degree of accuracy. I’m quite pleased with the end result. It works better, and it looks better.
And it isn’t a 3D printer part. Winner.

Leave a comment
You must be logged in to post a comment.