
Setting Up The CR Touch Auto Levelling System

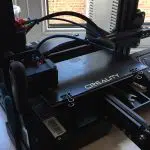
You might have noticed that our Ender 3 hasn’t directly featured in any posts for the last couple of weeks. Well, confession time: That’s because it wasn’t working properly and I couldn’t seem to get it running. However, a couple of days ago I finally managed to sort it out. Here’s what’s been happening.
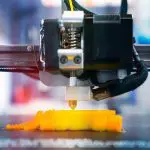
Recently I upgraded the printer with a CR Touch self-levelling system. This was easy to install and seems like a very high-quality piece of equipment, but I was having real problems getting it properly tuned. Self-levelling systems for 3D printers work by checking the height of the bed with a probe, then adjusting the print path to match the actual height of the bed. Obviously, to do this the nozzle has to be at exactly the height the self-levelling system expects it to be at – and mine wasn’t. It was a good two or three millimetres too high, so while the probe did its thing perfectly well the printer was just pumping out plastic spaghetti that didn’t stick to the bed. I followed the instructions for changing the Z-axis offset, but that didn’t seem to cure the problem despite multiple attempts. Finally I took the print head to bits, put it back together again and had another attempt at adjusting the Z offset, and it worked!
How To Auto Level Your 3D Printer
To set up the CR Touch, first make sure the sensor head is perfectly vertical – there’s a tiny amount of play in the mounting holes, and I think mine might have been very slightly off the first time I installed it. Install the right firmware. That will add some new options to the printer’s menus.
The first step is to lay your trusty piece of bed-levelling paper on the print bed, open the Prepare menu and hit Auto Home. Once the print head is in the home position go to Move Axis and then Move Z. Choose 0.1mm increments and move the head down until there’s some friction between the nozzle and paper, just like for normal levelling. Now either memorise the Z offset or, if you have a goldfish brain like mine, make a note of it. In my case the offset was 2.5mm.
Now go to the Control menu, find Bed Levelling and then Probe Z Offset. Enter the offset in here, then hit Store Settings. The printer will beep alarmingly, which I assume is to confirm that it’s stored the offset.
Finally, get back to the Bed Levelling menu and select Level Bed. The print head will travel to nine points on the bed – each corner, the middle of each side and the centre – and at each of them it will lower itself so the probe can sense the bed height. It’s a fairly quick process, and certainly a lot easier than doing it manually and chasing a mysterious error around the print bed for ten minutes.
With the bed levelled it’s time to do a test print – and yet again the printer just dribbled spaghetti all over the bed. This time, though, I just stopped the print, added another 0.1mm to the offset and tried again. That seemed to do the trick, and it’s currently working away on a test of an interesting new filament I plan to talk about on Sunday. Our Ender 3 is officially back in action!


Leave a comment
You must be logged in to post a comment.