
Infill – What’s That All About?

As we’ve discussed before, creating a 3D printed object isn’t just a matter of sending the file to your printer and going for a coffee break. You need to set things up properly in your slicing software, picking the right orientation and making sure enough support and adhesion are dialled in. But do you ever stop to think about infill?
I have to admit, I didn’t. In fact, until I first played with slicing software I didn’t really know that infill was an issue. I knew that 3D printers could produce hollow objects that couldn’t be made by other processes but, like most people, I’d sort of assumed that if an object wasn’t hollow it would be solid. Simple, right?
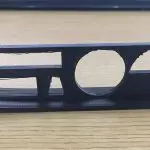
No, you don’t get away that easily. Unless you actually specify that, most 3D-printed objects aren’t solid. Instead, the interior is filled with a printed three-dimensional pattern called infill. This speeds up printing, saves material (and money) and gives a good balance between strength and weight.
So How Does It Work?
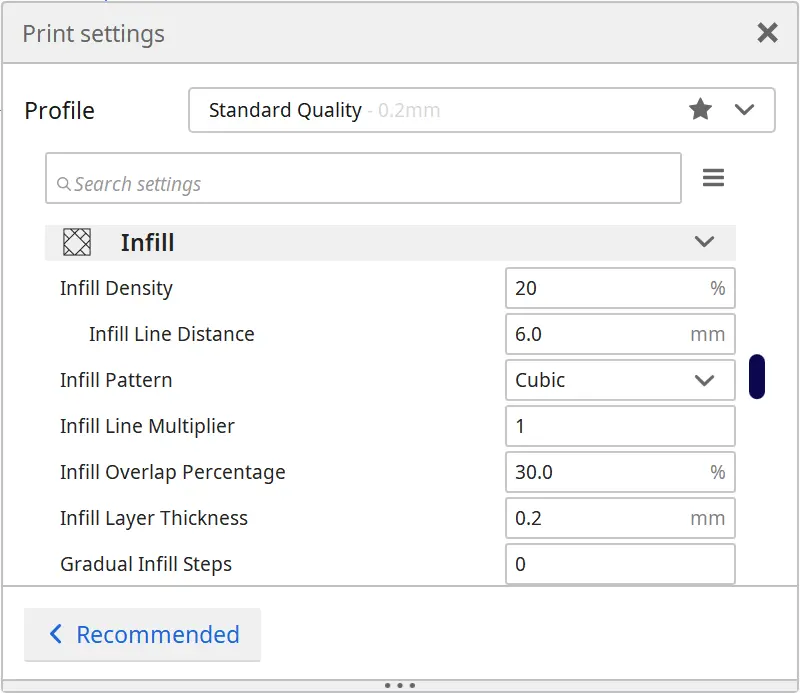
When you prepare a model for printing your slicing software will work out wall thicknesses and infill for you, but you can usually customise it yourself. If you’re using Cura you have a lot of infill options, so you can tune your print – but why would you need to?
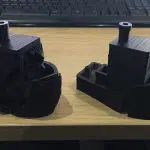
Infill has two main functions: It acts as a support during printing, and it adds strength to the finished object. Pretty much any infill will work as a support, but how strong does your object need to be? If it’s an ornamental sculpture the answer is probably “not very” – as long as it’s strong enough to support its own weight it will probably be fine. If it’s going to have any loads applied to it, though, strength becomes very important.
Cura lets you set the thickness of your object’s base, walls and top, which all affect its strength, but more importantly it also gives you complete control over the infill. There are two main things you can adjust; the density of the infill, and the pattern.
What Are The Options?
Density is pretty simple – it’s the percentage of space inside the object that’s filled in with plastic. Cura defaults to 20% but lets you set it to anywhere between 0% and 100%, where zero just prints the shell and 100% gives you a solid object. Sometimes you might want one of those extremes; usually you’ll want somewhere in between.
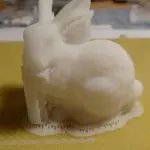
Using more infill will obviously mean your project takes longer to print and uses more filament. It also means it will be heavier and stronger, because there’s more plastic in there to add rigidity. If you’re making decorative items you can get away with 15% infill for larger items, down to 0% for smaller ones – the cat figurine I ran as my first test print on the Ender 3 doesn’t have any infill. If you’re making parts that need to take some load, or are prone to warping as they print, up the infill to between 15% and 50%. For structural or mechanical components 50% is the minimum and you might want to go all the way to 100%.
The infill pattern is also important. Cura offers no less than 14, and they all have strengths and weaknesses. Here’s a quick summary of the most useful:
- Grid – A simple pattern that’s quick to print but adds the least strength. Use this for decorative items.
- Triangles – Stronger than grid, but it’s a 2D pattern that only really adds strength in one direction. It’s good for stiffening thin rectangular objects, though.
- Cubic – This is a 3D pattern; it’s built up of hollow cubes that are tilted and stacked together. It’s more complex and slower to print, but adds strength in all directions. This one’s good for items that need to stand up to some load.
- Gyroid – A very complex, wavelike pattern that adds a lot of strength, but makes you pay for it in print time. If you’re printing transparent objects gyroid infill can look very attractive through the outer walls.
It’s worth experimenting with different infill settings to see which ones work best for you. The latest versions of Cura actually let you choose different settings for different parts of a object, which lets you add strength where it’s needed and save time and material everywhere else. We haven’t tried that yet; if you have, leave a comment to let us know how it went.


Leave a comment
You must be logged in to post a comment.