
OctoPrint – Can We Get It Working?

A while ago I talked about OctoPrint, a handy application that lets you control your 3D printer directly from your PC using a Raspberry Pi mini-computer as an interface. I meant to get it set up shortly after writing that post, but things intervened and I never got round to it. Well, today I finally got round to it!
To use OctoPrint you’ll obviously need a Raspberry Pi. I have a 4B model but the Zero 2, 3B and 3B+ are all powerful enough to run the software. If you want to be able to watch your prints remotely you’ll also need either the Raspberry Pi camera module or a webcam. Finally, you need OctoPrint itself. This comes with a custom version of the tiny computer’s OS, called OctoPi. If you’ve used a Pi before you’ll know it uses a Debian-based Linux OS with a graphic interface similar to Windows. Well, OctoPi doesn’t bother with the graphic interface, but it does run on the same Raspbian core. OctoPi trims off all the pretty but resource-hogging graphics and just gives you the core and the OctoPrint software.
Installing OctoPi
Because the Raspberry Pi runs its operating system from a TF card, changing OS is nothing like doing it on an actual PC. It’s a pretty painless task. The first step is to download and install the Raspberry Pi imager on your PC. Now put an empty TF card into your card reader and open the imager. Click the Choose OS button, scroll down to Other Specific Purpose OS and click on that, select 3D Printing and, finally, click OctoPi and select the stable version. Now click the Storage button and select your TF card. Finally, click on the Settings button at the bottom right. Check the box beside Set username and password and then set a password. Don’t change the username from the default value of pi; if you do, it won’t work. Check the box beside Configure wireless LAN and insert your WiFi network name (SSID) and password. Finally, click Save, return to the main screen and click Write.
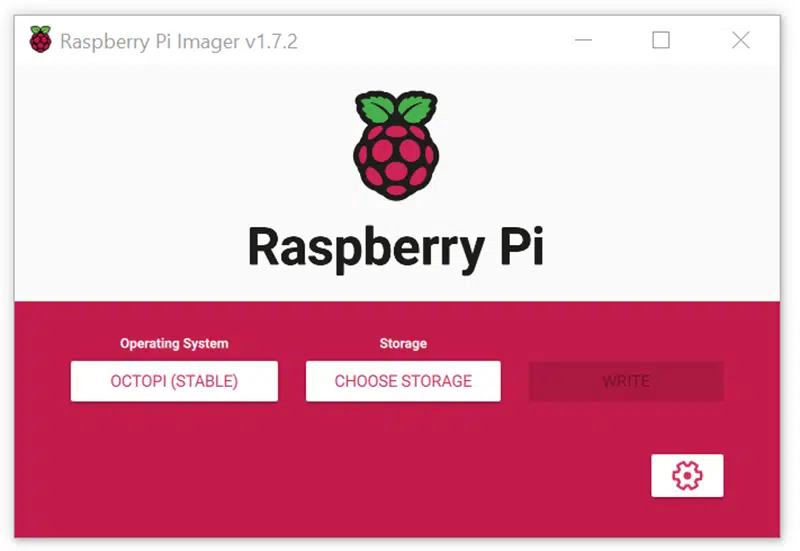
The Raspberry Pi Imager is nice and simple
The imager will compile OctoPi and write it to your TF card. This will probably take a couple of minutes, but once it’s done all you have to do is load the card into the Raspberry Pi, power it up and wait for it to scroll through a mass of text. When it asks for the username and password, enter them. The Raspberry Pi has now been turned into your OctoPrint server, and it’s already running.
Now you need to open the OctoPrint online client. Create an account if you don’t have one already, and log in. The client will give you a setup menu to work through, which is all pretty straightforward. Then you can create a printer profile. There are some premade profiles around, but while there’s one for the Ender 3 V2 there isn’t one for the (much more popular) Ender 3. Luckily it’s extremely easy to create one. Go through the dropdown menus and check boxes, entering the correct settings for your printer. For the Ender 3 these are:
- Form factor: Rectangular
- Origin: Lower Left
- Heated Bed: Yes
- Heated Chamber: No
- Width: 220mm
- Depth: 220mm
- Height: 250mm
- Axes: Default**
- Custom Bounding Box: No
- Nozzle Diameter: 0.4mm
- Number of Extruders: 1
Next, enter the connection settings on the dropdown menus:
- Serial Port: /dev/ttyUSB0
- Baudrate: AUTO
Connecting The 3D Printer
OctoPrint will now bring up its control panel then try, and fail, to find your printer. Now connect the Raspberry Pi to the printer with a USB cable; you’ll need a mini USB plug for an 8-bit Ender 3, or micro USB for the latest 32-bit boards. Make sure the printer is turned on, then hit the Connect button in the client. Your printer’s status should appear in OctoPrint, and you’re good to go. Instead of having to copy print files to TF cards – and be honest; how often have you dropped one and watched it disappear under the printer? – you can just upload it to the Raspberry Pi through the client and hit the Print button.
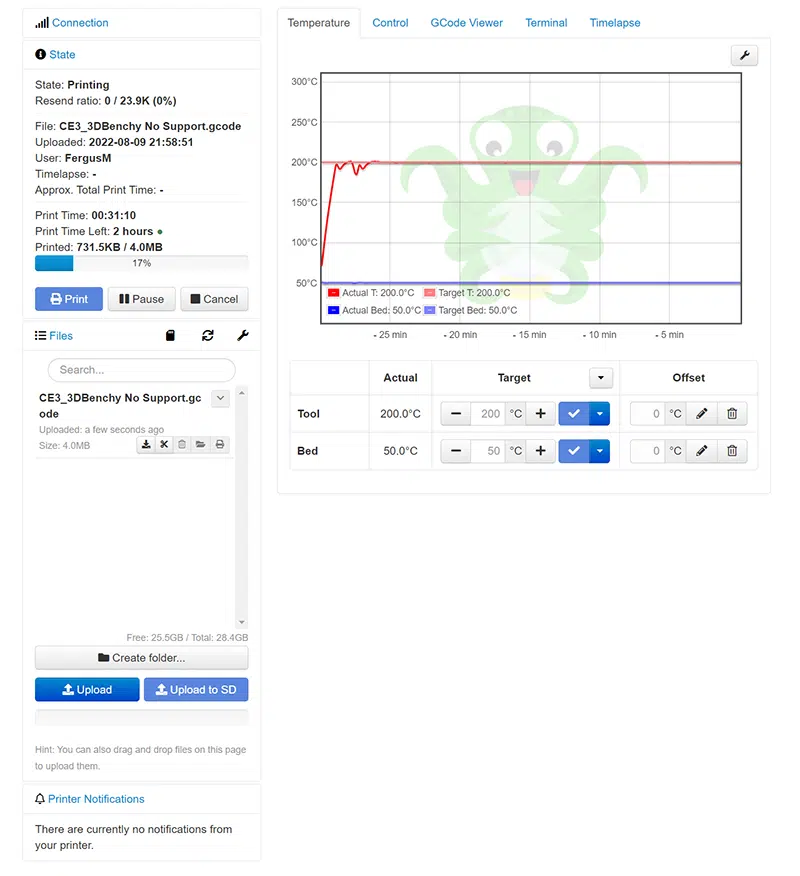
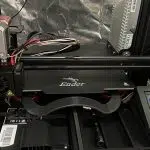
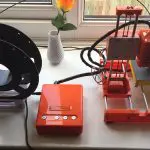
OctoPrint’s abilities don’t end at letting you easily load files, though. You can monitor, and adjust, your hot end and bed temperatures at any time during the print. You can manually move the print head. You can use the GCode Viewer to view the print job’s progress in real time. If your Raspberry Pi is fitted with a camera, or has a webcam connected, you can even view the printer’s progress remotely. The camera on my Raspberry Pi isn’t working, for some reason, but I plan to fix that in the next few days. I need to come up with a way to mount the Pi inside the printer enclosure so it can see the print bed, and tidy up the cables; right now it’s hanging off the edge of my desk like a spider in a web, which isn’t particularly professional looking.

I can do better than this
In an upcoming article we’ll look at using OctoPrint to remotely view the print job and make time-lapse videos. We’ll also explore its features in more detail, and try adding some plugins to give it more capabilities. So far, though, I’m really pleased with this software. At last I can send jobs direct from the PC to my 3D printer, just like I can with my boring old laser printer – and that’s the way it should be.


Leave a comment
You must be logged in to post a comment.