The Moment Of Truth – Does Our Ender 3 Work?
My last post ended with me sitting in my office, gazing proudly at our new Ender 3. I had, much to my surprise, succeeded in building a 3D printer. I’d even powered it up just to check the screen came to life (it did). There was only one big question left – did it work? Well, on Thursday I decided to find out.
Bedding It In
A few weeks ago we looked at print beds and how important it is to get them completely level, so of course I started with that. It’s a pretty simple process on the Ender 3. You just go into the menu, find “Auto Home” and press that; the print head will drop to the front left corner of the bed, and you can start the routine with a piece of paper and the adjustment screws.
So I found a sheet of paper, hit Auto Home, and the print head obstinately stayed at the top of the frame, whirring at me reproachfully. Question answered – it didn’t work. Then I spotted a stray cable connector peeking out from behind the Z axis motor.
Remember on Wednesday I went through plugging in all the electrical connections? I covered the motors, control panel and the main power lead, but the eagle-eyed among you might have noticed that I didn’t mention connecting the Z axis stop switch. Well, you should connect the Z axis stop switch.
With the switch now connected I hit Auto Home again, and this time the head dropped smoothly to the correct position. I slipped the paper under it and played with the screw until there was slight friction between head and paper, then repeated the process with the other three corners. The easiest way to do this is to find “Disable Steppers” in the menu; that cuts the motors, so you can move the head and print bed manually.
Ready To Print
With the bed levelled, it was time to load the filament. I hung the spool from the holder, clipped the end of the filament to a point and fed it into the extruder. This is a little tricky; the natural bend in the filament is enough to lead it away from the end of the feed tube, and although I tried to straighten it out the extruder mechanism wanted to bend it again, but eventually it went in and I pushed it all the way down the tube.
Now I just had to find something to print, so I loaded the TF card that comes with the Ender 3 and had a browse. There are three test files on it – Cat, Dog and Pig – so I selected Cat and pressed the button. Immediately the screen informed me that the bed was heating, and a couple of minutes later it whirred into action.
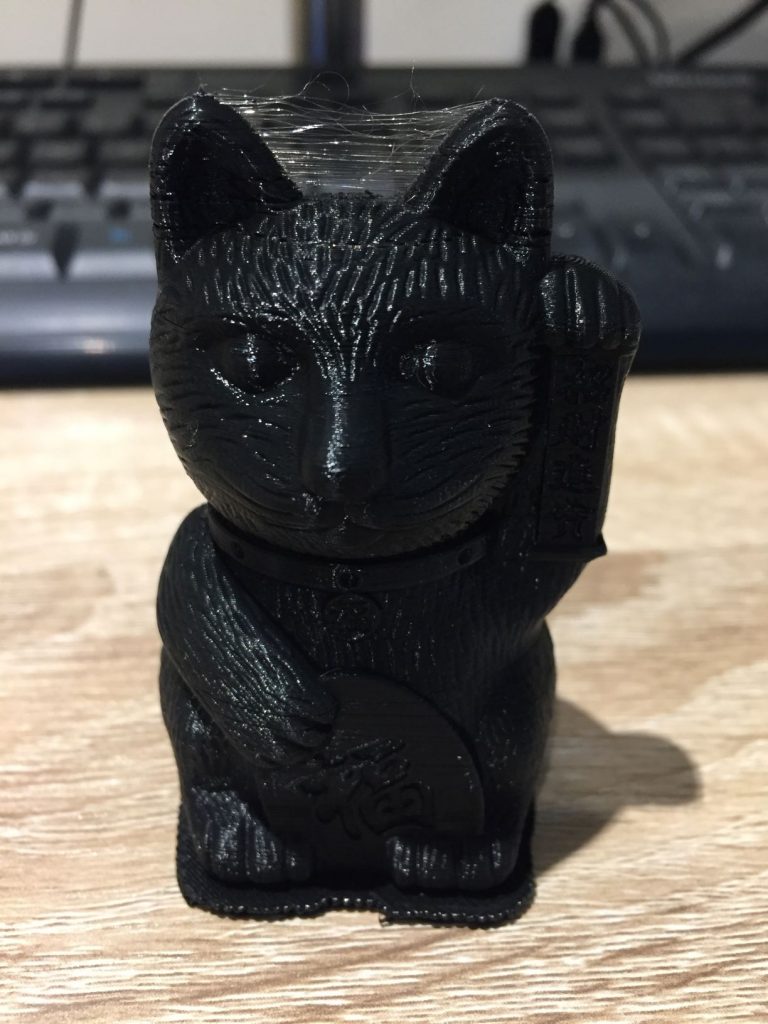
It seems the test print has all the quality options turned right up, because it took around five hours to print – but it did print, and I have to say I was very impressed with how it turned out. There was some stringing between the ears, which was easy to remove, and the small raft it printed on broke off cleanly. Being a cat it’s quite textured, but the coin it’s holding only shows faint layer lines. For a first attempt it’s a really nice print.
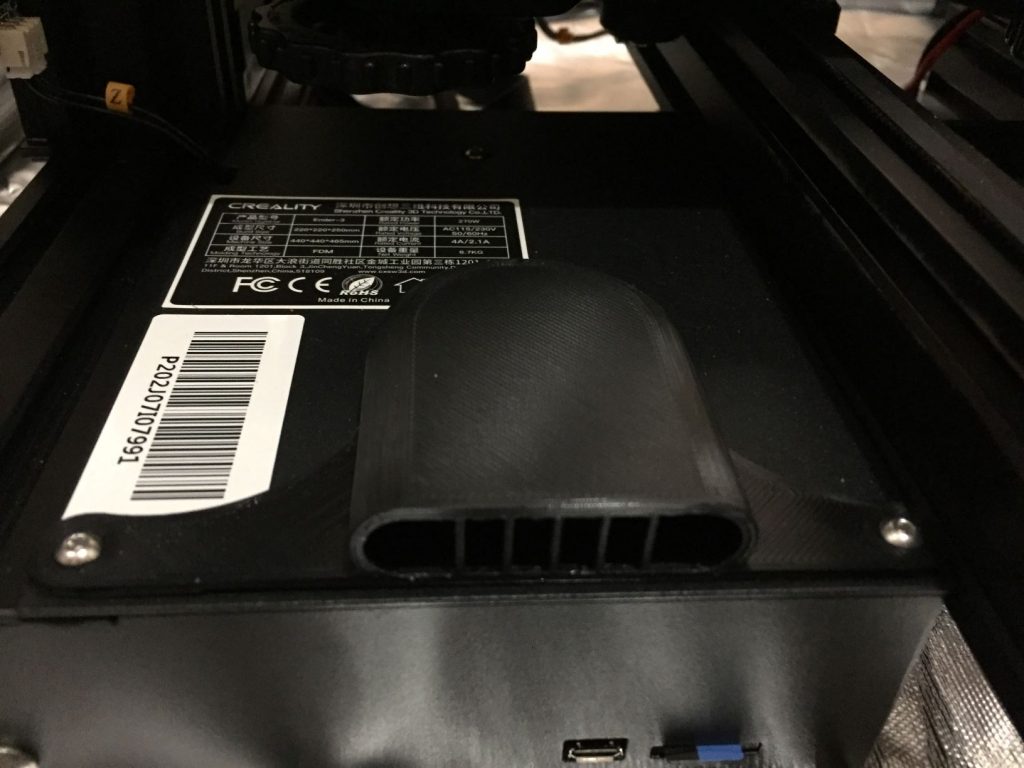
Since then I’ve printed a couple of little additions for the printer itself. One of these is a fan guard; the main fan is below the bed, and some users have said stray bits of plastic can fall into the fan and potentially jam it. The other is a box to cover the circuit board on the back of the control panel. I downloaded both of these from Thingiverse, which has a huge range of accessories and upgrades for most of the popular 3D printers.
I’ve had a couple of adhesion issues so far, but almost everything I’ve tried to print has worked out pretty well. I’ll be away from my 3D printer for the next week, but when I get back I’ll be exploring various ways to make the bed stickier – then sharing the results here. Check back soon to find out how it goes!



Leave a comment
You must be logged in to post a comment.