Review – Creality 3D Printer Enclosure
Last week I mentioned that we had a new enclosure for our Ender 3. At the time I thought it might be causing a problem – it wasn’t; the nozzle was blocked – and I did mention that in my post, so I thought it was time to set the record straight and talk about the 3D printer enclosure in a bit more detail.
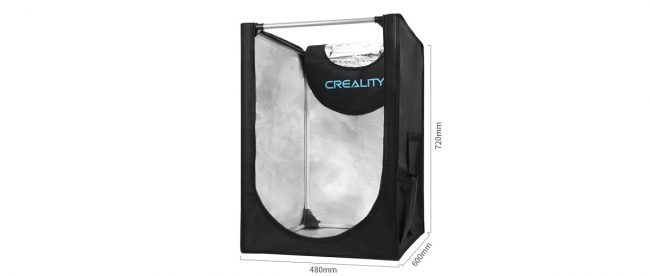
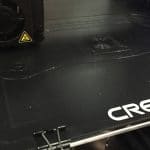
The enclosure we have is made by Creality and it’s designed to suit their small and medium-size printers, including the Ender 3. It cost £89.99 on ebay, which is a bit more than some of the generic, no-name ones you’ll find on there, but it also has a few extra features and plenty of room for the Ender 3 or any similar printer.
Yes, We Do Mean Plenty
Before I go any further I’m going to clarify the size of the enclosure. The numbers are 480x600x720mm, or 19x24x29 inches for those of us who still think in proper British units, but that doesn’t really describe how big it actually is. How about spacious? No, that doesn’t seem to cover it. Roomy? That’s lacking a certain something, too. Capacious? Generous? Ample?

No, let’s go with huge. This 3D printer enclosure is huge. It’s so huge that once I had it assembled I found myself thinking, “Bet I could fit in there.” Well, guess what? I can.
I’m five foot nine and own a deep fryer, but this thing is big enough for me to sit in – not very comfortably, I admit – and zip the door up. I should add that I didn’t actually zip it completely closed, because the zips don’t have tabs on the inside and if I’d done that I’d still be in there, pathetically calling for the neighbours to let me out.
I wouldn’t suggest climbing inside one yourself because it’s… well, it’s a bit stupid, really. Your printer’s probably going to fit, though.
What’s In The Box?
The enclosure comes in a slim, no-nonsense cardboard box. Inside you’ll find three bags of steel poles, a bag of plastic corner pieces, a folded nylon cover and perhaps the best instruction leaflet I’ve ever seen:

Install the poles. Then put the fabric on it. Well, what more needs to be said? Helpfully, the poles all have a sticker to say what size they are; you get four each of sizes 1, 2 and 3. Plug them into the plastic corners so you have two rectangles, each with two each of sizes 2 and 3, then use the four size 1s to connect them. That’s you installed the poles. Now put the fabric on it. This is a bit of a tight fit, but it isn’t hard and once it’s done the whole thing is nice and secure.

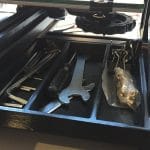
The fabric itself is a heavy textured nylon, similar to Cordura, and the inside has a heat-reflective silver lining. The right side has a generous pocket – I keep tools and spare bits in it, but it will probably hold a roll of filament too – and, just behind that, a big flap that lets you run power and data cables to the printer. There’s another flap on top. A zip lets you open up the whole front and top of the enclosure, and there’s a generous clear window in the front so you can (in theory) check on progress without opening it up. In practice the window is just clear plastic and it’s hard to see much detail through it, but it does give a nice view from inside.

The Verdict
3D printer enclosures have two main functions. One is to protect the printer from dust, which won’t do anything for your print quality, and it does that extremely well; with the front zipped up and the flaps closed, dust is basically excluded. It also does a good job of containing the smell of hot plastic, which is a nice bonus, and reduces the noise of the printer a bit too.
The other function is to manage heat. Draughts and temperature changes can affect your print, making layer lines more visible and in extreme cases causing layer separation. An enclosure keeps the temperature around the printer more or less constant, and a good bit warmer than the room it’s in – if I open the enclosure and stick my hand in, it’s noticeably warmer in there. Does that help print quality? I think it does. Since it arrived I’ve had absolutely no adhesion problems, and (when the nozzle isn’t blocked) print quality has been consistently good. I have some nylon filament arriving this week, and that will be a real test. The Ender 3 and similar 3D printers often struggle with nylon, but I’m hoping the enclosure will keep the temperature up enough to get good layer adhesion.
Overall this is a sturdy and high-quality enclosure that will protect your 3D printer from dust and draughts. It’s big enough to hold most hobbyist printers comfortably, and the flaps and pocket give some very useful versatility. I’d say an enclosure is pretty much essential if you want to keep your 3D printer running well, and the Creality model is a good one.


Leave a comment
You must be logged in to post a comment.